Saturday, November 17, 2012

I think I'm going crazy

We only have 4 more days until we leave for our Disneyland vacation so I'm in overdrive.  I've got the itinerary all typed out and printed out, packing lists have been made and checked, and remade and rechecked, all our crafts are done (at least for now) and I'm just ready to have some fun with my family in the Happiest place on Earth! Here's a look at the crafty stuff that we have done minus the travel treasure chests which are already in the car.
Everything that we have done.

Lanyards
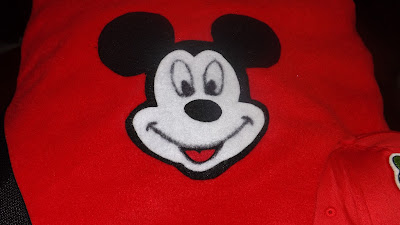
Close up of the cool Mickey and Gang pic


Quillows

Bayahni's hair bow...the other girls have much smaller bows

My son's hat

Small backpacks for the kids...again girls get Minnie, my son gets Mickey

Journals to help capture our memories

Autograph books/picture books

Personalized water bottles

T-shirts for all the kids, girls with Minnie, my son has a Mickey head
So there it is in all its glory, our Disneyland crafts collection.  I feel like I forgot something, so if you see something that you think is missing, please, PLEASE let me know.

Saturday, October 27, 2012

A Meal That Will Haunt You

Today we celebrated my sons birthday, a few days early, but because his birthday is on a Wednesday this year, we opted to celebrate the Saturday before.  He only asked for three things:
  1. He wanted 2 families over
  2. He wanted me to make his dinner look scary 
  3. And he wanted Lego's, lots and lots of Lego's
So, as his mom, what am I to do, his wishes aren't too outlandish, so I set forth on a mission to have the best birthday party yet.  And guess what?  It was fantastic!!

Here are some pics:

The Banner that I made...each of those circles and bats were hand cut.
My Punch was steaming over.

Shrunken Head Punch...Carved Apples in Apple Cider with Cloves for eyes.

Witches Fingers in Cockroach Puree...carrots and hummus

Giant Nail Clippings...Frito Scoops

Frankenstein Brains....aren't they cute?

Used Q-Tips....yummy cake pops


Flesh Eating Worms.....jello


Boo-nanas...bananas with chocolate chips

It was tons of work to do it all by myself, but it was tons of fun to see it all come together so well.  Adults and kids all seemed to have a good time, there was one little one that didn't want to eat anything because it was gross or scary. Sorry buddy.

Wednesday, October 24, 2012

Halloween/Birthday Madness

So, not only are we getting ready for our first trip to Disneyland, but it was my middle daughter's birthday in September, and Halloween in my son's birthday.  This year we decided to celebrate with just a couple friends and have a "Frightful Feast."  On the menu is:
Frankenstein Brains, Witches' Fingers, Giant Nail Clippings, Cockroach Puree, Flesh Eating Worms, Used Q-Tips, and Shrunken Head Punch.  I'll be sure to post pictures of the gathering when it happens, but for now, I must get everything ready.

Saturday, October 13, 2012

I'm Back, and I brought more Disney fun!

Not that I really went anywhere, well, a little crazy perhaps, but I'm back.  Things have been really busy for our family the last couple weeks and I've neglected to take a lot of pictures of things I/we have done, or blog about anything as well, but today to make up for lost time I/we did a ton!

I finished sewing the last couple quillows:
 I also made hair clips for the girls:
 A hat for my son:
And autograph books too:

I also made cake pops for the first time, but that's another post all together.

Saturday, September 22, 2012

Quillow questions?

So yesterday marked another 9 days down in our Disneyland countdown, which means we are doing another craft project to get everyone hyped up.  I asked the kids of the things that were left what they would like to do, and they all unanimously agreed that they wanted to make Quillows. 

"What is a quillow?" you may ask.  Well that's easy, quilt + pillow = quillow.  It's a blanket that can be folded up into itself to make a pillow.

To start I got purchased some fleece because you don't have to worry about frayed edges and it's nice and warm, so it makes a perfect product for this.  I got 2 yards of 54" material for each blanket, 4 blankets = 8 yards of fabric, plus a 1/2 a yard of a complimentary color, no need to get extra here 54" is enough for the pockets.

Our blanket color is black, and our pocket color is red to go with the Disney/Mickey Mouse theme.

First cut the red material into 1/4 to make a pillow size rectangle. (the kids helped with all the cutting and the pinning, I did all the sewing.)

Then I found the center fold of the black fleece along the bottom and marked it.  I found the center bottom of the red and laid it on top of the center of the black. 


Next I pinned the materials together. 


Finally I  sewed along the sides and bottom of the pocket. 


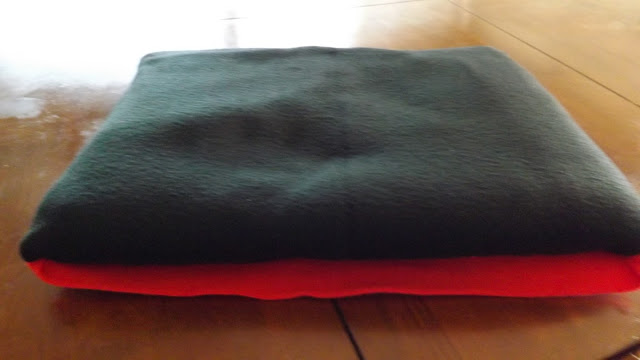
All done! 

Now the only question I have is: Should we use the Mickey Mouse head, or should we do his trouser buttons to accessorize?

Wednesday, September 12, 2012

And the Countdown Begins

That's right ladies and gentlemen, the countdown until Disneyland has officially begun.  There is only 72 more days!  Okay, okay, I know, 72 days is a long ways away,  but I wanted to build the anticipation up for this trip.  It's our first time going to The Happiest Place On Earth, and for all I know, it could be our last, so I'm all in, on this one!  To help build the anticipation, we are doing a craft project every 9ish days, and today was our first craft.  The kids and I put together lanyards to keep our tickets and fast passes, and emergency information in.  Here's what it looks like:
My oldest sporting her lanyard
So you Say that you may want to try your hand at making one of these.  Here is what you need to do the job:

Some 1" Strapping, a "D" ring, a clip for 1" strapping, a lanyard pouch, a clip, and for decoration I made these cute Disney pins.


1. You will need to measure the length that you would like your lanyard to be. We used about 30" per lanyard.  Be sure to finish the edges by burning them or using an anti-fraying product.

2. Next thread your strapping through one end of your clip and sew it in place.
3. Slide the D-ring on and then determine how you want your lanyard to lay.  For us it ended up that there was a 1/2 twist in the making of it, so that it would be flat when it was complete.

4. Now that you know how you want it, thread and sew the other end on.


5. Both ends should now be sewn on.  Clip them together and take the D-ring that is just sliding around and find the center of your lanyard.
6. Sew the D-ring in place so it stays put.
 You're pretty much finished now.
7. Just add the lanyard clip to the D-ring, and the pouch to the end of that clip, and you are all done!
If you chose to embellish with anything, this is the time that you would do so.  For us, I just pinned the button on, and we were set.
 Don't forget to check back soon for more crafting fun as we get ready for our vacation!


Sunday, September 9, 2012

House full of Monkeys

Well, this last week my youngest child started preschool.  We weren't thinking that she would make it into the school, she was on the wait-list, and we were told that our chances were slim.  Then, I got a phone call that there was an opening for her, and she started the next day!!  I don't know if I'm happy about that or really sad about it, she is my last, so I yearn to keep her my baby forever, but alas, they grow up and I must accept it.

Isn't she a cutie!?!
Anyway 3 of my kids are now at parent participation schools, which means that 4 hours each week I am in each of their classes, and even though I'm not required to be in my eldest child's school each week, I am there as well.  So that means that I have 3 schools, and 4 days of volunteer work each week, it's been a whirlwind to say the least, and has left me with little time to do anything outside of kids. 

Today however, I was able to do some crafting fun.  I took one of my husband's old t-shirts, and I cut it up into a vest for my teenager, and a pillow for my rocking chair.  I also was able to make some homemade....well semi-homemade...monkey-bread.  I wasn't able to take pics of the vest because my daughter grabbed it up so fast that I couldn't.  The pillow, well it's a pillow, it's burgundy, it's soft and fluffy.  But the monkey-bread, now that's what this is all about. 


Sooooo Good, and so easy.  Here it is:

  • 4 tubes of Pillsbury (or store brand works too) biscuits, but not the grands, they are too big, just the regular size ones
  • 1/2 cup of butter or margerine
  • 3/4 cup of sugar
  • 3/4 cup packed brown sugar
  • 2 teaspoons cinnamon 
  • gallon zip top bag

Preheat your oven to 350 and grease or spray a bunt cake pan.
While oven is preheating, prepare your mix by putting the sugar and cinnamon into your zip top bag.  Open your biscuits and cut each into quarters and place into the sugar and cinnamon mixture, only do one tube at a time or you won't get a good coat on all your pieces.  Take out the coated pieces and put them into your greased bunt pan, and repeat the same steps for the next three tubes of biscuits.  Melt the butter and add the brown sugar to it, then pour the mixture over the pieces in the bunt pan.  Put the whole thing into the oven for 40 minutes.  Remove promptly from oven and cool for 10 minutes before removing it onto a serving plate/tray.  Cool for another 5 minutes, then serve warm.

MMMMMMM
And tonight I swapped out the sugar for truvia so that at least there was a little bit less guilt for eating it.  Still turned out amazing.

Thursday, August 30, 2012

Travel Treasure Chests

I've been working on making something to help keep kids occupied during long road trips.  I knew what I wanted to include, but needed a cool name to call it.  My son came up with the title "Travel Treasure Chests."  And though there is no actual chest, there is a whole lot of fun packed into a fairly compact area.  Here's what the ingredients I used:
  • Baking sheet
  • Sandpaper, medium grit works great
  • Dry erase markers at least 2 colors
  • Dice 5
  • Laminated game boards
  • Yarn
  • Clip magnets 2
  • Pencil pouches, NOT boxes
Sounds like a mess of random stuff, but I promise this is going to be fun.

So first I started with baking sheet, the kind that are magnetic.  You can use some old ones that you already have or just get the cheap ones from Wal-mart or Target.  Next I took  the yarn and cut different colors in various lengths.  Make sure that you have several of each color and length, and then put them into a pencil pouch.  Now take the magnetic clips and clip the sandpaper to the baking sheet, and wouldn't you know it, the yarn sticks to the sandpaper, so you now have a travel art set.

The next thing I did was find some games that we could print on paper.  The list we came up with was tic tac toe, Yahtzee, connect 4, and that game that you have to connect lines to make a square...I have no idea what it's really called.  I printed two each, back to back, of tic tac toe, and Yahtzee, and one each of the others, also back to back.  I then laminated the sheets.  Now they are like dry erase boards.  Pack dice and dry erase markers into another pencil pouch and you can now play games with your seat mate.  The cookie sheet keeps the dice contained when you roll.  You use the same magnetic clips that you use for the sandpaper to hold the game boards.  And for the connect 4 you simply use different color markers and draw in the circle that you want.

When you have everything done, you simply put the games on the sheet, clip the pouches with the magnets and stick them on top of it all, then tuck it under the seat of the car, or in the pocket of the front seats for safe keeping and easy storage.

Here are a couple pics of what I've done.  Forgive me for not including the yarn, sandpaper, and dice.  The kids thought that it was time to use it now, and didn't want to let me take it back, even just to take a picture o.O So I promise, that I'll get pictures soon and post them on here.

This is a front and back view, one game on each side.

that box game I was talking about on one side

connect 4 on the other side

Almost everything all put stored.

Wednesday, August 29, 2012

I'm organizationally challenged

Yup the title says it all.  I was not born organized, and it took me many years to get to where I am (which by the way, still isn't great), but where I am now is so much better than where I naturally fall.  If you are like me, you may desire and dream of a nice minimalistic home where everything is in perfect place and there is no dust anywhere to be found, but as soon as your alarm goes off and you open your eyes, you realize it was just that, a dream.  Instead you may be surrounded with clutter, and paperwork that needs filed, laundry that needs done, or dishes that need put away.  Now don't go thinking that I live in the same kind of conditions as someone off of an episode of Hoarders, my house isn't dirty (well maybe the ceiling fans), just cluttered.  But I wanted to share with you all (3 readers) that there is hope for us.  I have done lots of research and implemented several things from lots of the things I have found, and have compiled a list that may help.
  1. Use a calendar.  This may sound silly, but if we get in the habit of writing things down in the same spot every time, then you can easily find what you're supposed to be doing and not double book or miss anything.  I have a giant 2ft by 3ft white board calendar on my wall.
  2. Color code things.  For our family of 6 we have 8 colors on our calendar.  Each person has their own color.  Then as a family we have a color, and finally we have a color just for general purposes.  This way I can look at my giant calendar and if I see a certain color I know that that particular person has something going on that day.  I also try to color code anything else that I can for quick reference, backpacks, lunch boxes, water bottles, clothes hangers, etc.  It's all game for color coding.
  3. Check out the flylady. But don't over do it, just work the baby steps for now.
  4. Make a weekly menu.  I use emeals because honestly, I can't come up with a whole week at once, then the grocery list! It's too much for my fried mommy mind.  For less than $5 a month, they do the work for me and I print and shop.  AND now they also do lunches for an additional charge, but I used their sample plan, and everyone loved it!
Ok, so that's about all I really have going for me right now, but let me tell you, it took my house from stacks of mail and piles of laundry to desktop space, and peace and calm.  Still not great, but headed in the right direction.

Friday, August 24, 2012

School is in Session

I just want to start by saying that I love my kids and my family with all my heart.  Now that I've got that out there, I want to say, I am so happy that school has started again!  That sounds so bad, even just typing it makes me cringe a little.  I never wanted to be that mom that was so happy when their kids weren't home all day, and really that's not why I'm excited for them to be at school.  I'm excited because I need that routine and consistency.  I've been going bonkers all summer long trying to make sure that we had things to do and that the kids enjoyed themselves.  So much so that I didn't get a chance to really enjoy spending that time with them, which breaks my heart. 

Now we all get up early, the kids get ready for school as the hubby makes his lunch and I get things into backpacks and breakfast served.  Then I take them to school, and get anything else that needs done done.  This week alone I have had 3 doctors appointments for myself (I've been neglecting going because I didn't want to take all the kiddos), and laundry is all caught up (not an easy task with 6 people), but best of all, I got the kitchen mopped AND it dried without footprints all over it...AMAZING!

Each day after school I have been more appreciative of the time I get to spend with my rugrats and we giggle as I help them with homework (PS Algebra homework on the second day of school is NOT cool), the kids have been wanting to help me with making dinner more lately, so that's been great too.  We all eat at the table as a family, every night, we chat about our day and really connect with each other.  It's great.  The kids then get showered and ready for bed, pick out their clothes for the next day, and we get to have some family quiet time to relax, NO T.V. read a book, or play a game, sometimes we go on a walk or a bike ride after dinner too.  And I no longer feel so overwhelmed and anxious. 

So I guess I'm okay with being that mom, because it makes me appreciate them more when they aren't always connected to my hip.  Now the battle to get the school system to do a year round school....I kid, I kid....or do I? ;o)

Thursday, August 16, 2012

Organizing for another school year


So as much as I would like to have been born organized, I wasn't.  I have never been very good at keeping things the way that I have wanted to.  Having multiple kids has helped me though, THANK GOODNESS. 

This year I have made a vow to myself and my family that I am going to keep all things school organized.  So I did some research and got things all set up to get us off to a good start when school starts back up on the 20th.  My kids already have their own designated colors for our calendar, so if I look at the calendar and see something in purple I know it's for my oldest daughter, but if I see something in blue I know it's for my son.  This trick has saved my sanity, and you will see that I incorporated their colors into this system as well to help everyone.


First I made a spot for the kids to put their things.  I used some 3 drawer carts that we already had, and stacked them in a cabinet that is by our desk.

(Excuse my steam mop)
Then each kiddo got a drawer that currently only has a spiral notebook and a composition book, but will also be where their long term homework goes, library books, and project from school that they wish to keep.
This is my son's drawer
Pencils, sharpener, crayons, glue, dictionary, etc


filler paper and printer paper


I also set up a Home/School communication area.  Again each kiddo got a folder, and inside they will leave me all the papers that they get from school each day/week.  At the end of the day, when they are in bed, I will check the folders, sign what needs to be signed, file what needs to be filed, toss what needs to be tossed, and put anything on the calendar that we need to.  If there is something that needs to be taken back to school I will put it on the "school" side of the folder and the kids check it in the morning before going to school and gather anything that needs taken back.

folders on my desk

inside of the folders


So there you have it, my attempt at being organized.  And please if you see me in a couple months, ask me how I'm doing with this, I know it's going to be a challenge for me to maintain :)